Friday

Meet The New "Lara Croft" for Tomb Raider Finally Revealed

The Tomb Raider's revive has anointed its new Lara croft. Another pretty lady named Alicia Vikander, an oscar winner for last year’s movie "The Danish girl".
Alicia will step into the combat boots that was last filled by Angelina Jolie from 2001’s Lara Croft: Tomb Raider and 2003’s Lara Croft Tomb Raider: The Cradle of Life . Now, the most interesting part is Roar Uthuag is directing the newest adaptation of the popular video game series.


Although there had been side talks that Daisy Ridley was eyed for Lara Croft's role, Daisy, who had starred on The Star Wars: The Force Reawakens, said there were "initial conversations" which didn't get a formal approval.
Now that we are aware and its official that Vikander had been Approved for the role, some people may feel or ask what makes Vikander fit to be Lara Croft, well, Vikandar had a big breakthrough year in 2015, appearing in 7 great movies:
  • Son of a Gun, 
  • Seventh Son, 
  • Ex Machina, 
  • Testament of Youth, 
  • The Man From U.N.C.L.E., 
  • Burnt, 
  • and The Danish Girl. 

Below is a photo of Vikander,.... she does looks fit to be Lara Croft. Doesn't she?


She’ll stay in the limelight this year with Tulip Fever, Jason Bourne, and The Light Between Oceans. These are also quite remarkable movies to watch out for.

And as for a new Tomb Raider Movie and of course the new Tomb Raider Video Game, nothing had been announced yet but it won't take too long for both a New Lara Croft movie and Game to be released,
Angelina Jolie is out, 
Expect a new face. Vikander is the new Lara Croft.

Tuesday

Integrate and Show Facebook Audience Network Ads on WordPress & Blogger blogs [ Web/Mobile version ]

In this post, we will show you how to apply, integrate or use Facebook FAN Ads (Facebook audience network) on your Blogger and WordPress blogs or web apps. With this feature, you'll be able to display and earn with Facebook ads on your WordPress and Blogger blogs. This stuff works on WordPress sites too, using a bit of a different method.

Facebook Audience Network (FAN) has been around for a couple of months now and there seems to be positive progress for publishers using it, especially those who receive tons of traffic to their Apps or Mobile sites.

The aim of the network is to help publishers earn money from their App and Mobile sites (blogs) they run just like we have other Publisher networks (e.g: Google AdSense, Media.NET etc), the only difference with Facebook Audience Network "at the moment" is, the Program is ONLY for Mobile Apps and mobile sites.


If you're wondering if you can use FAN ads on a Blogger blog, the answer is, sure, YES YOU CAN. I had given it a try and I'll show you how to Integrate it into your Blogger blogs using the steps below.

We all are aware that all Blogger's sites mobile version is found at this URL ==> www. example . com.html?m=1 
 Or for example : www.editweaks.com.html?m=1

This URL, along with your device and browser details are what tells Facebook that a User is viewing your site on Mobile, hence make them display F.A.N ads.

There are only 4 simple phases you have to pass to Set it up.
1. Register for a Facebook Developer account
2. Apply with your mobile site or App for Monetisation
3. Integrate the script into your mobile site (Blog)
4. Get Approved, Go Live and start earning from it.

Details:

1. Register on FB Developers if you haven't already
Use your Facebook profile to Register a Facebook developer account here and Add your website URL in "ADD New App." Read more about setting up your App on this page

2. Get Started with an App 
Once you've created and Added App from Step 1, take note of your APP ID, we'll be making use of that later.
Now, head go to Facebook Audience network page, click START NOW.
Select the App you created for your Website, next, we will use the app and website to Apply for FAN ads. That page will also take you through all the steps to Create Advert Placement which you'll apply on your blog (mobile site) later.

3. Getting Approved, 
You have to integrate the codes you're given into your website. The codes come in 2 pairs which you'll integrate into your Blogger template.
Go to your Blogger Settings >> Template >> Edit Template HTML.
look for <head>
Just below it, Paste these lines of code (where you see APP ID, replace it with your App ID number you copied in step 2.)

<script id='facebook-jssdk' src='//connect.facebook.net/en_US/sdk/xfbml.ad.js#xfbml=1&amp;version=v2.5&amp;appId=APP ID NUMBER HERE'/>

Now hit Save.

4. Go Live 
Again, Go back to your Blogger settings >> Layout >> Add gadget >> JavaScript/HTML >> Paste the code given to you after you created ad placement in 2nd Step above.
In the ad code you'll find something like this ===>  testmode="false"
You can turn that to "true" so that Facebook is aware you're trying or testing it out to Get Approved for FAN ads.

Now, Hit Save and exercise some patience, it may take days or a Week but you should Get an Alert and Mail from Facebook once you're Approved.

Facebook Audience Network Ads for Blogger blogs


After then you can set back your FAN Ad code to testmode="false"

Quick Fix: VLC Audio Issues - Video Not Playing Sound For Android

VLC media player for Android and PC is a free and open source cross-platform multimedia player that plays most multimedia files as well as discs, devices, and network streaming protocols.
Although with a complete database, an equalizer and filters, VLC plays all weird audio formats but sometimes when we have some Videos or sometimes Audio files on our Android smartphones and gadgets, VLC cannot play Audio sound for it.
I use Android 6 Marshmallow, it should work on Lollipop 5.1 or lower Android OS. Here is a quick fix:

1. Update the App - Go to PlayStore and get the latest VLC for your Android

2. Change VLC app Settings - this works whether you have updated your VLC App or Not. Follow the simple steps.
i.) Launch VLC
ii.) Tap Menu >> click Settings
iii.) Scroll down and tap Advanced
iv.) Here you'll find Audio Output , Tap it and select "OpenSL ES"


Now go back and play the files (Video or song) again, it should play with Audio sound for you to hear and enjoy.

Sunday

How to Create a Video Guide from Scratch with Movavi Screen Capture Studio

One of the most effective ways to create video guides regarding anything on a computer is with screen capture, which is also possible on Android devices as seen in our previous post. By capturing what’s happening on your screen, you can literally show viewers the steps that they need to take to perform a certain task – while narrating instructions to them using a voiceover.


At first it may seem as though creating such a video would require technical know-how, the truth is that with Movavi Screen Capture Studio, it is actually rather easy due to its intuitively designed interface and features. In fact aside from the software itself, the only other thing you need is a script of sorts that details what steps you want to show, and how you want to show them.
Recording the Video Footage.

ALSO READ: How to Get Started Driving Traffic with Videos

Once you have both the software and script, you can start to record the video footage you need. With Movavi Screen Capture Studio you needn’t limit yourself to screen capture, and can actually also choose to record footage via a webcam. In some cases you may even want to use a combination of different types of footage, including some recorded with other devices.

If you do choose to record the footage via screen capture then all you need to do is set the capture frame, select the audio source, and click ‘REC’ to start recording. For video guides in particular you might want to take advantage of some of the other features that will let you display keys that are pressed on screen, highlight the mouse cursor, and set up a custom ‘click’ sound.

Editing and Polishing the Video Guide

In any case, once you have actually recorded the footage that you need with Movavi Screen Capture Studio, the only other part of learning how to make a training video is to edit and improve it. For that you can use some of the features of the software to:
  • Trim out unnecessary footage and merge clips together in the sequence required.
  • Add audio tracks to include a voiceover or background music.
  • Insert text that can be customized to create unique-looking captions, subtitles or watermarks.
  • Apply special effects and filters to stylize the appearance of the video.
  • Improve the video quality manually or automatically and correct common issues with the recording.
  • Place animated transitions between scenes of your video guide.
Between all these features you should definitely be able to polish your video guide so that it looks professional and attractive. As you experiment more with the features in Movavi Screen Capture Studio and develop a feel for them you’ll find that you’re able to apply them more effectively and really tap into their potential.

Wednesday

How to Install TWRP and Root HTC 10

This guide will show you how to Install TWRP and root the latest HTC 10, (also called M10) Android Smartphone that was released earlier this month in 2016

To quickly introduce us to the fresh flagship, the HTC 10 or M10 is a 5.2 inch display smartphone released May 2016 running Android Marshmallow out of the Box. M10 is a very impressive mobile compared to its predecessors (the likes of Htc M8 and M9).

With 4GB RAM, 32/64gb ROM variants (expandable via Memory card), a cool 12MP rear cam and 5mp front camera. HTC lives on a 3000mah battery, and the device got rounded up with an awesome finishing, a really smooth body design.

root and install twrp on HTC M10


Just few weeks to HTC 10's official launch, TWRP already released custom recovery which will be easily accessible for the new owners of the HTC 10 and according to what we heard, the better part of the good news is, in as much as HTC allowed user modifications like rooting and TWRP, they still provide Warranty for it! which is really awesome, I mean, which phone company does that?!

ALSO READ: How To Use The Best TTF Custom Fonts and Font Apps For Android Smartphones

Anyways, lets do this:

Easy Way to Install TWRP recovery and Root the HTC 10

Download the latest TeamWin-twrp official version (3.0.2-1), it's the best version to use for your HTC 10 device => DOWNLOAD HERE twrp-3.0.2-1-pme.img

1. To Install the TWRP on your HTC 10, We have to unlock Bootloader and install Fastboot.
i. ) Fastboot Install Method =>
Get Platform tools for Android SDK for your PC (Use SDK only) , install SDK and download the Platform-tools  to get ADB and fastboot.

ii.) For Windows Users => Get the right Drivers on your PC. You may Use this universal ADB drivers. Or miniAdb here (choose C:\ drive when installing)

2. Now pick up your HTC 10 device, plug it to your PC, on the phone go to Settings >> About >> find the Build Number and tap it 7 times to enable developer settings.  Press back and go into Developer Options and enable USB debugging.
On your computer, open a command prompt ("Windows Menu key + R." then inside it type CMD and hit enter)

3. Now type as below, after typing each command press enter key:
adb reboot bootloader

4. You should now be in fastboot mode. Remember the TWRP-3.0.2.1.img we downloaded earlier? copy the file into the same folder as your adb and fastboot binaries. Rename the image (TWRP-3.0.2.1.img) to twrp.img and type:

fastboot flash recovery twrp.img

fastboot reboot

Now you can Reboot to TWRP using the right key combo to enter recovery for HTC 10 - this is usually to press Volume Up + Power button.

To Complete Rooting Process on HTC 10

6. Download SuperSU for HTC 10, and move the file to a folder in your phone memory, and flash it using TWRP.
To flash with TWRP - Boot to TWRP >> Browse to the location of the TWRP (SuperSU.zip) image on your device and select it.
7. Select recovery from the partition list and swipe to flash.
Alternatively, you can downloaded and Install SuperSU from Google PlayStore and use Root checker to confirm Root Access had been successfully granted on you HTC 10.
Your Questions or contributions are welcome :)

Sunday

Root Infinix Hot 2 running Android 6 Marshmallow & Change Its IMEI - A working Guide

When you search the web, you'll find there are various posts about how to root your Infinix Hot 2 (running Android 6 Marshmallow) floating already, they're almost everywhere, I wanted to do this long time ago but didn't because I owned another smartphone, hence didn't have time to play with the Hot 2 until now that I got to root mine and changed the IMEI with no errors.
Also note that rooting is now a more important thing to do on Android 6.0 if you want to change the Infinix Hot 2 IMEI.


I'll try to make this guide as simple as possible and "perhaps" different from the ones you may have read else where.
Let's quickly Root the Infinix Hot 2 X510 running Android 6.0 Marshmallow.

ALSO READ: How to Root Infinix Hot 4 (X557) and Install TWRP recovery

REQUIREMENTS - 
Your PC (Windows 7 or 8)
Working USB Cable

Things to Download
- Infinix Flash tool => DOWNLOAD HERE
- VCOM drivers=> DOWNLOAD HERE
- Recovery Enabler => DOWNLOAD HERE
- TWRP Recovery For Infinix Hot 2 AndroidOne_X510 => DOWNLOAD HERE
- Super Su for Infinix Hot 2 Marshmallow - Download Here

FIRST STAGE

Once you have all requirements ready...
1. Unzip these downloaded files and keep them on your Desktop - Recovery enabler and TWRP recovery for Hot 2
Secondly, move the Super SU.zip into the Root folder of your Infinix Hot 2. It should look like the Screenshot below when you had moved it.


2. Launch the Infinix Flash tool.exe (Run as Admin)
3. Wait for few minutes
4. Pick up your Hot 2 and activate Developer and USB debug mode(found in Settings). Switch off the phone and remove the Battery.
5. Now Infinix flashtool must have opened, click browser and Select enable recovery button Infinix hot2 a1 >> Select and open MT6580_Android_scatter >> Click Start

6. Now pick up your Infinix Hot 2 (Switched Off & battery removed) and plug in the USB, and wait a few minutes for the file to install into the device. You get a "Download OK" pop-up if successful.


7. Again, flash the TWRP Recovery For Infinix Hot 2 using same steps in 5 and 6. Disconnect the USB when done.


SECOND STAGE

Completing the Rooting Process on the Infinix Hot 2

Flashing that TWRP is what grants you access to the Boot & Recovery Menu.

8. Now enter your Boot Menu, Press and Hold the Power + Volume Up Button
9. From the Menu >>  Select Install >> Select the SuperSu.zip
After the Installation, go back to the Main Menu and select Reboot.

After rebooting, SuperSU app may ask you to Download SUPER SU Installer to complete the Process, just switch your Internet on and Download it, once download it complete, it will install and restart your Device.
Congrats, you've successfully rooted your Hot 2. Use Root checker to Confirm root access.

Changing IMEI on your Infinix Hot 2 (on Android 6.0 Marshmallow)

To do this, Simply Head to Google PlayStore and Install the Chamelphon APK.
It requires root access and will change your Hot 2 IMEI.
Hope this guide was easy for you.

Friday

Top 10 Best Android Smartphones in Nigeria (Below ₦50,000)

You are probably reading this post because you want a quality smartphone and you likely have a budget that is around or below 50K ( #50,000 Naira or $250).
And I understand that this is 2016 (as at the time this post was first published), we'll update this list for 2017, finding the right choice of phone that has reasonable specs is not easy considering your money ( #50,000 ) is relatively between the high side, hence should at least get you one of the best brands in town.

Most smartphones especially Android, (whether cheap or expensive Android) does almost the same thing, the obvious difference with them always rise from their Durability, effectiveness, material build (they're not mere plastic like the cheap ones) and of course, Branding and User experience with its Operating System.
So; with your budget, below are some of best smartphones you can buy at the Best prices for less than 50k ( #50,000 Naira or $250).

1. Asus Zenfone 2 (₦49,000)

The Taiwan phone manufacturing company made an awesome model on this one. The Zenfone 2 packs alot of quality, awesome body and great specs at a very good price tag.
13MP back camera
5MP front camera
Dual SIM Card Dual Standby (Two Micro SIM Card Slots, One TF Card Slot)
3000mah Battery
Display Size - 5.5 inch
Operating system - Android Lollipop
==> CLICK HERE TO ORDER/VIEW PRICE OFFERS


2. Infinix Note 2 (₦43,000) 

Infinix being among the popular brands after Tecno, the Infinix Note 2 packs alot of battery juice, that feature made it its selling point, and of course it comes with other interesting features.
OS: Android Lollipop
Camera: 13 MP Camera, 2 MP Front facing Camera
Display: Size: 6 inches HD Display
Internal Memory: 1 GB RAM, 16GB ROM (expandable)
Battery Life: 4040mAh Lithium Ion
==> CLICK HERE TO ORDER/VIEW PRICE OFFERS

3. Tecno Camon C8 (₦39,000)


Camon C8 is one of the best sellers Tecno released last year, till now, the smartphone is still making a good wave considering the fact that there are so many people who love taking photos and Camon C8 does that very well, alongside more awesome specs and it's relatively very affordable below 50K.
Key Features
Display Size: 5.5 Inches
Processor: 1.3GHz Quad Core
RAM: 1GB
Internal Memory: 16GB
Operating System: Android Lollipop 5.0
Back Camera: 13MP
==> CLICK HERE TO ORDER/VIEW PRICE OFFERS


4. Gionee - Elife S Plus (₦46,000)

Gionee has some fascinating devices that are worthy of praise at its design and battery capacities. The Elife S Plus packs some of the coolest features Gionee had produced on their smartphones as seen in its specs below:
Android OS, V5.1Lollipop
2GB RAM,16GB Internal Memory
5.5 Inch HD Amoled Display With Gorilla Glass 3rd Generation
1.3 GHz Octacore Processor
13MP Primary Camera & 5MP Front Camera
Dual Sim, Dual Standby ==> CLICK HERE TO ORDER/VIEW PRICE OFFERS


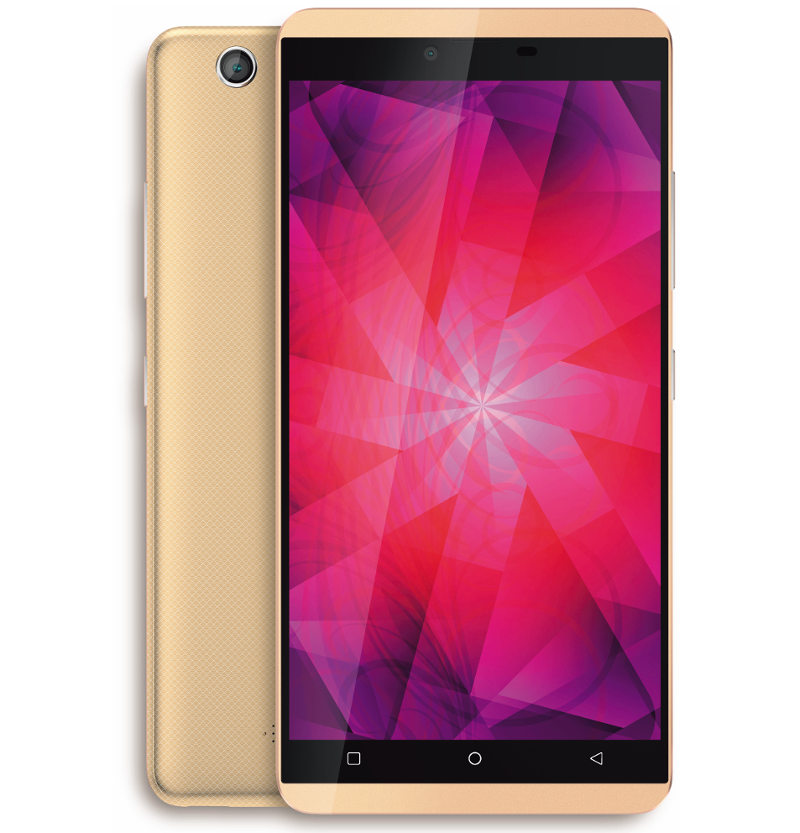
5. Innjoo 2 (₦44,000)

Late 2015 was quite a remarkable year for the Innjoo manufacturers after they released some cool flagships with Innjoo 2 standing on top of others. This device comes with a really smooth design and new feature which is a Finger print sensor.
5" HD Display with Dragon Tail Glass Protection
2.5D Full Metal Frame
7.3mm Ultra-thin
13MP Front Camera
13MP Back Camera
3G Connectivity, Bluetooth, Wi-Fi
3200mAh Battery with Power saving technology & Rapid Charge
Dual Micro SIM
Runs on Android 5.1 Lollipop
==> CLICK HERE TO ORDER/VIEW PRICE OFFERS


6. Samsung Galaxy Grand Prime VE (49k - 52,000)


We know Samsung is always getting ahead with their durable nice-looking Android phones. This is one of the nicest touch they gave their Galaxy Prime Series, although it is slightly above 50K but this depends on the shopping malls, some Sellers do sell it for less than that.
The smartphone sports the specs below:
Primary Camera - 8 MP
Secondary Camera - 5.0 MP
Processor - 1.2 GHz Quad Core Processor
RAM - 1 GB
Internal - 8 GB
OS - Android OS
Network - 3G
Screen size - 5 inches ==> CLICK HERE TO ORDER/VIEW PRICE OFFERS


7. Samsung Galaxy J2 - (₦44,000)

Galaxy J2 is a very portable phone that inherits few resemblance with the Galaxy Prime VE, and if you look at their features, you might agree that Galaxy J2 doesn't have as much features as the Prime VE but J2 still upholds nice qualities, display and cameras.
Dual SIM (Micro-SIM, dual stand-by)
Super AMOLED capacitive touchscreen, 16M colors
4.7 inches (~64.7% screen-to-body ratio)
Android OS, v5.1.1 (Lollipop)
Quad-core 1.3 GHz Cortex-A7
8 GB, 1 GB RAM, Expandable microSD, up to 128 GB (dedicated slot)
5 MP, f/2.2, autofocus, LED flash
Battery- 2000mAh
==> CLICK HERE TO ORDER/VIEW PRICE OFFERS


8. Lenovo Vibe P1 - Pearl (₦40,000)


A very nice device that arrived the market late 2015. The phone's memory is quite spacious and it sports a very clean design followed by the specs below:
Display Size: 5.5" HD
Processor: 1 GHz Quad Core
Memory: 16GB; RAM 2GB (MicroSD up to 32GB)
Operating System: Android Lollipop 5.1
Camera: 8MP (LED Flash); 5MP (Front)
Battery: 4000mAh ==> CLICK HERE TO ORDER/VIEW PRICE OFFERS


9. Huawei Honor 4C (₦47,000)


The Huawei Honor 4C is a strong sleek valuable device that also has strong qualities, it sports a 13MP Back camera, 5MP front cam, 2GB RAM, 8GB ROM (expandable) and it's quite portable as it is just 5 inches screen display.
 ==> CLICK HERE TO ORDER/VIEW PRICE OFFERS

10. Tecno Boom J8 (₦41,000)


This is the latest model in the Tecno's Mobile collection, Boom J8 is a successor of the previous Boom J7, the device carries improvements both in design, build and user experience. We had shared the specs here. See below for more specs:
5.5" HD Display
7.35mm thin
5MP Front Camera
13MP Back Camera
4GLTE/3G Connectivity, Bluetooth, Wi-Fi
3000mAh Battery with Power saving technology & Ultra-Charge
Dual Micro SIM
Runs on Android 5.1 Lollipop
 ==> CLICK HERE TO ORDER/VIEW PRICE OFFERS

That's where we'll take a pause till our next update about Mobile gadgets.

Note however, that the Prices were based on the time this post was published, hence the prices of these devices in our list may change over time.

Sunday

TECNO BOOM J8 Review | Full Specs & Price - The Music Phone is Back!

The Music phone is Back! Tecno Boom J8 had been officially launched 31st March 2016, it is the successor of previous model Tecno Boom J7 that was released last year and we even reviewed here.

We know the former Boom J7 smartphone raked a lot of users and after looking into this Boom J8 review and specs, we may comply that this might also yield same good results, probably because too many people love music and this device satisfies that criteria very well.

Below we have the Boom J8 smartphone's photos, specifications, reviews and price, you can check it out and order from Nigeria, Ghana, Kenya or where ever you are.


See More Specification Details of the Tecno Boom J8 below -

DISPLAY: 
Screen Size -
5.5-inch

Screen Resolution - 720 x 1280 pixels (320 PPI), IPS
 Capacitive touchscreen
BODY SIZE:     
 Dimensions - 153.3 x 76.84 x 7.35 mm

CAMERA:
Back Camera - 13.0MP,  4864 x 2736 pixels, autofocus, LED flash
Front camera -  5.0MP,  (With Auto Focus and Flash for both Cameras)
MEMORY:      2GB RAM + 16GB ROM
  (External Memory Card Support - 128GB Maximum)

PROCESSOR:


64-bit Quad-core, 1.3GHz Cortex-A53
Cortex-A7 CPU, MediaTek MT6753 chipset,
Graphics processor - Mali-T720 GPU

OS (Operating      System) :         
   
 Android 5.1 (Lollipop) with HiOS UI
SIM TYPE
 Dual SIM, (Micro Sim card)
NETWORK DATA:    2G / 3G / 4G LTE
CONNECTION:   - Wi-Fi 802.11 b/g/n, Wi-Fi direct
  - WIFI hotspot,
  - Bluetooth - 4.0
BATTERY:
  Capacity
- 3000mAh Non-removable Li-ion Battery with Fast charge feature
OTHER FEATURES :
AVAILABLE COLORS: Super White. Space Grey, Champagne, Gold

- SNS integration
– MP4/MPEG4/H.263/H.264 player
– MP3/WAV/eAAC+/AC3/FLAC player
– Document viewer
– FM radio
– Image viewer and editor
– Voice memo/dial/command
– Predictive text input
– Preloaded apps –  Gmail, Gtalk, Google Now, Youtube, Flash Share, Facebook, Palmchat


PRICE & WHERE TO BUY: Price of The TECNO BOOM J8 is Sold for 46,000Naira.


FINAL VERDICT:

After observing the Tecno Boom J8 we surely agree that it packs some improvements over its predecessor, the design is premium and the feel too should be that way considering its material build, however we are waiting for the moments when these manufacturers will produce an awesome design without copying the likes of iPhone 6, either ways this design should be another reason why users will love the Boom J8.

Secondly and in conclusion, we noticed a special headset, the Boom player headset, which looks visibly big and should produce quality sound for Music, we also found Tecno had finally installed its own custom UI based on Android OS known as  HiOS user interface, this new innovation is present in the Tecno Boom J8 hence users should expect a whole new level of experience when using the device.
Once again, Enjoy! Coz #‎ItsBoomTime


  • DISPLAY:          5.0" , HEATED GLASS "NOT" CORNING GORILLA GLASS
  • DIMENSION:   142.4 X 73.2 X 10.1mm
  • MEMORY:        1GB RAM + 16ROM
  • CAMERA:         5.0MP BACK CAMERA (WITH FLASH), 2 MP FRONT CAM
  • OS:                    ANDROID 4.4.2 (Kitkat)
  • SIM type:           Dual SIM [Micro and Normal-SIM]
  • NETWORK DATA: 3G/2G
  • PROCESSOR & CPU:    QUAD-CORE, 1.3 GHz
  • BATTERY:          2000 mAh
  • - See more at: http://www.editweaks.com/2014/12/hands-on-review-infinix-hot-x507-with-specs-and-price.html#sthash.iopB05Fe.dpuf


  • DISPLAY:          5.0" , HEATED GLASS "NOT" CORNING GORILLA GLASS
  • DIMENSION:   142.4 X 73.2 X 10.1mm
  • MEMORY:        1GB RAM + 16ROM
  • CAMERA:         5.0MP BACK CAMERA (WITH FLASH), 2 MP FRONT CAM
  • OS:                    ANDROID 4.4.2 (Kitkat)
  • SIM type:           Dual SIM [Micro and Normal-SIM]
  • NETWORK DATA: 3G/2G
  • PROCESSOR & CPU:    QUAD-CORE, 1.3 GHz
  • BATTERY:          2000 mAh


  •